Thursday, May 6, 2010

Scenary

For my scenery for my animation i went for the look of a pasture, as in accordance to the fable i have animated, this essently is a field that has fences to keep the oxen in and a single entrance to get in and out, the fences are made from blocks that i extruded to get the right size, the material used for this was a jpeg found on the internet and has a gnarled wood effect.
Here is a render of the fences

Next i made the grass, this was made using a plane tool and then adding a jpeg image onto it, i then made copies of this to create a bigger pice of land
Here is the render of the grass


I then made a trough for my oxen, this was made from a block and breveld then extruded down, i then added a water texture to a seperate block to give the impression of the trough being filled with water
Here s a render of my trough


I then had to make the background for my scene, this was simply another plane that hasd another jpeg of the sky added to it.
Here is a render of my background.

Here is a render of the fence, grass and trough together

The Animation

The animation would not load up on blogspot so cannot be seen on here, I am pleased with the results, even though i found it very difficult to animate using bones, after alot of time and effort i managed to make a animation, once i was happy with the movements of my models it was time to start using camras, this was quite simple to do as it involved little movements of the camra with the "Auto Key" applied, there is a total of 8 scenes in my animation and is approximatly 3 minutes long.

Once i was happy with all my scenes i imported each scene into premier pro and put them together to make a short film, next on the list was to find a song or songs to go with the animation, also baring in mind it was for children the song had to have no swearing.

I decided to use the song "Feel Good - Gorrilaz" i chose this song as it is one of my favourite songs from when i was younger and also for the relaxing ay it is sung, also at the end of my animation the last scene shows my lion laughing, and this song has a nice little clip of music laughing which fitted in perfectly with this scene.

Overall I am extremely pleased with my animation, if i was to change anything i did, i would spend more time on the bone rigging and less time on the models which would allow more time to animate.

It has been a fun and enjoyable experiance and I am looking forward to more animation in the future.

Bones


Now that my models were comlplete i could begin using bones which would allow me to animate the models for my fable.
At first i found this very difficult and tediouse to get used to, but once i had used it for a while things got alot clearer, also following tuturials set out buy the tutor i was able to get the bones to work, below i will show the different bones and full assembly of bones for each model

Here are the bones for my lions head


Here are the bones for my lions legs

Here is the bones of the fully asembled lion


Here are the bones for the Oxens head.


Here are the bones for the Oxens legs.


Here is the full assembly of the Oxen


With these bones I can now begin animating my Lion and Ox, the bones have sections called "Fins" these are designed to extrude outwards and jut sit under the skin of the model, this allows maximum freedom of movement without the model crumpling when moved, which happend alot in the early stages of using the bones or "Rigging".
The images above are screenshots of the bones as they would not render using 3ds max, i had to screenshot them, copy them to word, increase there size and size copy them into photoshop were i roted and sized them up A6.

Wednesday, May 5, 2010

Models - Ox

After i made the lion it was time to create the ox, first i started with the body, this was simply a sphere and would make the ox's body.


Next i made the ox's head, this again was a simple sphere but alot smaller then the body, .


I then created the gorns for the ox, this was made from a cone and bent and soft selcted into shape.


Next i created the eyes and eye sockets, the eyes were made from spheres and the eye sockets were created using half a spahere and hollowing out the inside so the eyes could sit inside.


Next i created the mouth for the oxen, again this was made from a sphere and extruded, bent and soft selcted into position.


Next i made the teeth for the ox, these were simple boxes that were turbosmoothed to be less jaggady round the edges.


The last part to be made was the tail for the oxen, this was made the same way as the lions tail.


Here it an assembled view of the ox's head


Here is the assembly of the finished ox
Now that this model was done i could begin animation using bones.

Models - Lion

Ok so i have decided to go for the lion and the four oxen story, so my next task is to create models for the animation, this obviously will involve a lion and four oxen, because this is aimed at children i didnt want to have detailed models, more cartoonish type models to keep the children interested, first i started on the lion.

I began with the body, this was started using a single block, which i then soft selected the corners to give it a more unatural shape, next i riased the shoulders for the legs to give it a more lion-ny look, I also raised the front part at and angle to create a neck for the lion.


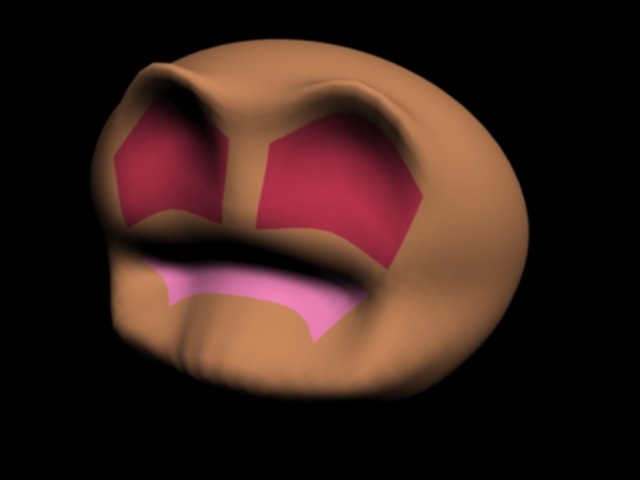
After the body was completed I then began modeling the lion head, again i start with a single block and soft selcted the edges to give it a rounder look, i then selected polygons to create ears for the lion, after the ears were completed I created the mouth of the lion, this was done by selected polygons and then soft selecting them to create a mouth shape.


I then made small indents on the front of the face, these were the eye sockets, this was done by selected the polygons and extruding thm backwards.


Next i went on to make the lions mane, this was created using a sphere, then scaling it down so it was thin, i then extruding point out and applied the nurb tool to give it a realistic lion look


I then created the whiskers and teeth for the lion, the whisker were made from cylinders and using the bend modifer and soft selection made them look more realistic, the teeth were made from cones and soft selected and bent into shape.


I then began modeling the lions legs, these were made from a single block an soft selected into shape, the foot of the lion was made by making the bottom polygons bigger, the toes wer created by extruding polygons outwards.


The next part i made was the eyes for the lion, this was made from a sphere and placed in the small indents made earlier for the eye sockets, eye brows were also made from cylinders and placed above the eyes.


I then made the nose for the lion, this was a sphere that was soft selected into shape, this would sit between the "cheeks" of the lion


I then created the cheeks for the lion, these were sphere that were soft selcted into shape.


The last part of the lion was to create the tail, this was made from a cylinder and using the bend modifier was bent into shape, the tail end was made from a sphere and attached to the end of the tail, this was soft selected to get the shape.


Putting the lion together took some times, here is an assembly of the lions head


And here is a render of the assembled lion.
With the model of the lion animation can now begin.